动画开发小记
- gsap 代码片段
- gsap 中的一些默认值
- gsap 中的 position 参数
- gsap 种的媒体查询
- gsap 使用 pin 后的布局偏移
- gsap pin 需要有顺序
- gsap scrollTrigger 的几个函数
- gsap 实现数字递增动画
- framer motion 神器 AnimatePresence
gsap 代码片段
普通的 gsap.to 和 gsap.from 比较简单就不用代码片段了,我这里设置了滚动动画的代码片段也就是用 scrollTrigger 插件的时候,一般有两种写法,我是喜欢 Advanced example 这种写法,还有一种是 Standalone/Custom example
定义项目级的代码片段,输入 up 生成 gsap 的代码片段

gsap 中的一些默认值
gsap 有挺多属性方法,记住一些常用属性默认值,不用重新设置,让代码更简洁
| 属性名 | 默认值 |
|---|---|
| start | 默认值是'top bottom' |
| end | 默认值是'bottom top' |
| duration | 默认值是 0.5s |
| ease | 默认值是 "power1.out" |
| pinSpacing | 默认值是 true |
gsap 中的 position 参数
要实现一些复杂的动画,用 gpt 的时候,它老是会给一些 > 和 < 的方法,这其实跟时间轴有关
.to( target, vars, **position** ).to( target, vars, **position** )< 表示上一个动画的开始时间。将 < 视为返回到上一个动画开头的指针。
tl.to('.class', { x: 100 }, '<')tl.to('.class', { x: 100 }, '<')> - 上一个动画的结尾**。将 > 视为指向上一个动画结尾的指针。
tl.to('.class', { x: 100 }, '>')tl.to('.class', { x: 100 }, '>')一个复杂字符串,其中 += 和 -= 前缀表示相对值。当数字跟在<或>后面时,它被解释为相对数字,因此<2与<+=2相同。例子:
+=1 - 时间轴末尾后 1 秒(产生间隙)
-=1 - 时间轴结束前 1 秒(重叠)
myLabel+=2 - 标签myLabel后 2 秒
<+=3 - 上一个动画开始后 3 秒
<3 - 与<+=3 相同(<或>后面隐含+=)
>-0.5 - 上一个动画结束前 0.5 秒。这就像说上一个动画的结束加上 -0.5
gsap 种的媒体查询
现在的网站越来越多响应式,对于动画的响应式,也挺重要,gsap 也提供了媒体查询,我会用来适配不同的屏幕,大于 1280 的才做动画,小于 1280 则不用动画,因为遇到的设计稿常常是 pc 横图,可以充满屏幕方便做动画,而 h5 也是小横图,是不太方便做动画的,而且个人感觉手机上的性能可能还不太好去做复杂的动画
useGSAP(() => {
  let mm = gsap.matchMedia()

  mm.add('(min-width: 1280px)', () => {
    const t1 = gsap.timeline({
      scrollTrigger: {}
    })

    t1.to('.item', {})
  })
})useGSAP(() => {
let mm = gsap.matchMedia()
mm.add('(min-width: 1280px)', () => {
const t1 = gsap.timeline({
scrollTrigger: {}
})
t1.to('.item', {})
})
})gsap 使用 pin 后的布局偏移
首先说明这是个可以忽略的问题
这是目前没看到解决方案的一个点,在刷新页面的时候,页面位置会变化,虽然影响不大,这获取是 gsap 用了 pin 后 动态计算位置的问题
比如以下代码:
'use client'

import { useGSAP } from '@gsap/react'
import { gsap } from 'gsap'

const Page = () => {
  useGSAP(() => {
    const t1 = gsap.timeline({
      scrollTrigger: {
        trigger: '.section1',
        pin: true,
        scrub: 1,
        toggleActions: 'play none none reverse'
      }
    })

    t1.from('.title1', {
      opacity: 0.5
    })
  })

  useGSAP(() => {
    const t1 = gsap.timeline({
      scrollTrigger: {
        trigger: '.section2',
        toggleActions: 'play none none reverse',
        pin: true,
        scrub: 1
      }
    })

    t1.from('.title2', {
      opacity: 0.5
    })
  })

  return (
    <div>
      <div className="section1 flex h-screen bg-slate-900">
        <h1 className="title1 m-auto text-[40px]">第一屏</h1>
      </div>
      <div className="section2 flex h-screen bg-slate-800">
        <h1 className="title2 m-auto text-[40px]">第一屏</h1>
      </div>
    </div>
  )
}

export default Page
'use client'
import { useGSAP } from '@gsap/react'
import { gsap } from 'gsap'
const Page = () => {
useGSAP(() => {
const t1 = gsap.timeline({
scrollTrigger: {
trigger: '.section1',
pin: true,
scrub: 1,
toggleActions: 'play none none reverse'
}
})
t1.from('.title1', {
opacity: 0.5
})
})
useGSAP(() => {
const t1 = gsap.timeline({
scrollTrigger: {
trigger: '.section2',
toggleActions: 'play none none reverse',
pin: true,
scrub: 1
}
})
t1.from('.title2', {
opacity: 0.5
})
})
return (
<div>
<div className="section1 flex h-screen bg-slate-900">
<h1 className="title1 m-auto text-[40px]">第一屏</h1>
</div>
<div className="section2 flex h-screen bg-slate-800">
<h1 className="title2 m-auto text-[40px]">第一屏</h1>
</div>
</div>
)
}
export default Page可以看到在第二屏刷新却回到了第一屏的位置
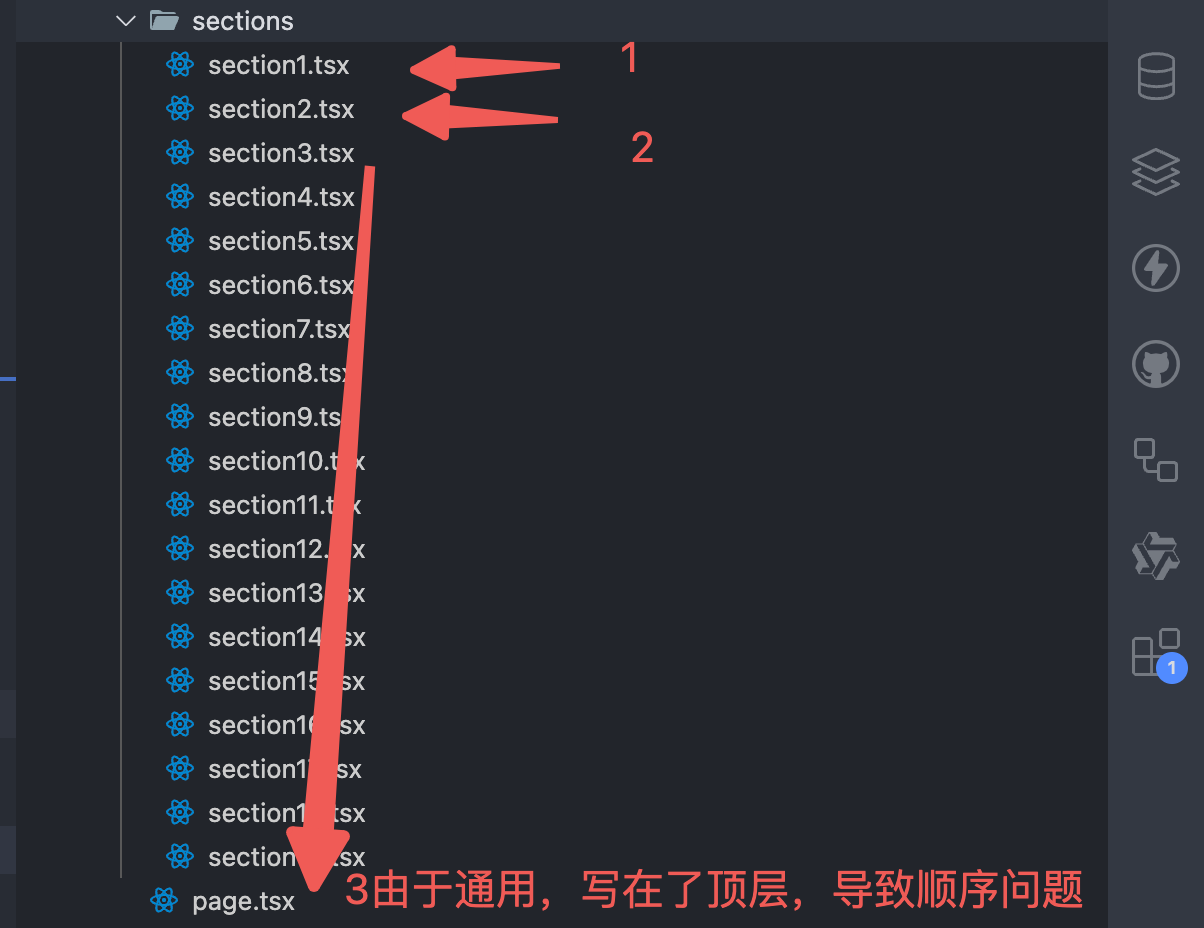
gsap pin 需要有顺序
用 pin 的时候,gsap 会动态计算高度,所以图片和元素高度一定要有,其次是顺序,如果顺序不对,pin 后的元素会错位
比如抽离的 hook 和写在组件的 hook 没有随着 section
比如长页面的时候,pin 的位置没有随着 section
用 markers:true 可以看到设置的 start 和 end 位置:
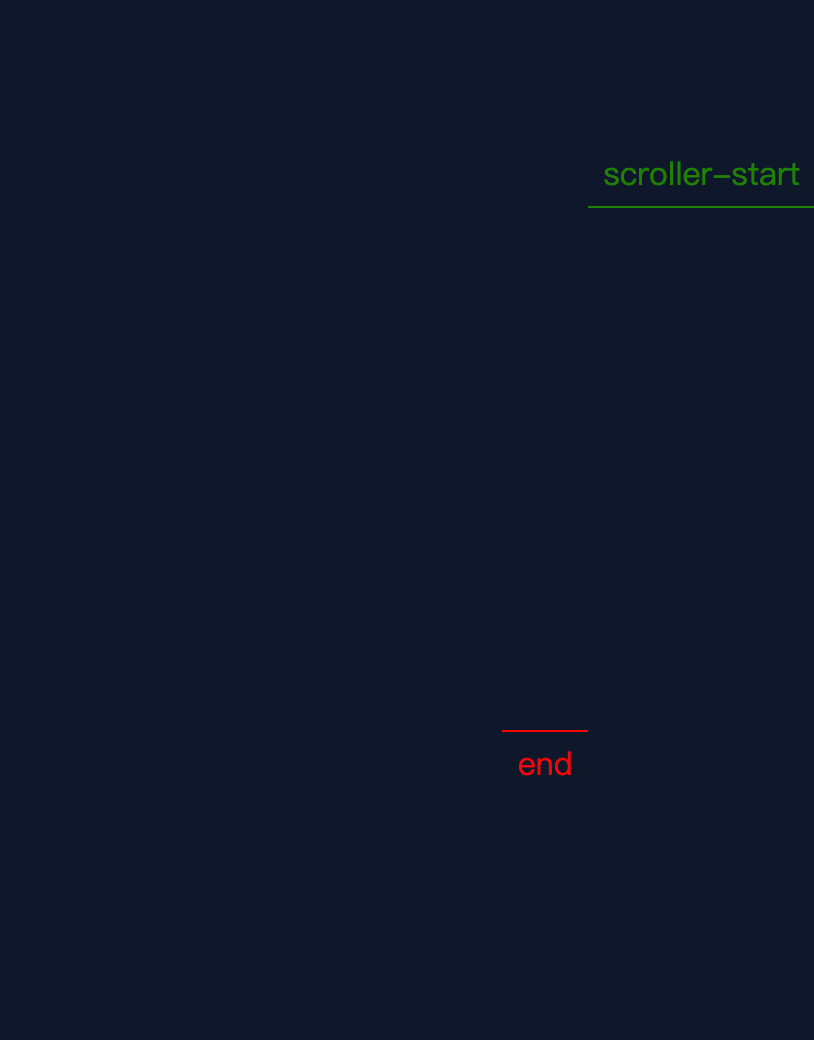
但是 start 和 end 的线跟你写的位置不符的时候,就可能是顺序问题
gsap scrollTrigger 的几个函数
这几个函数很重要!有了这几个函数,更方便的实现复杂的动画,如下:
gsap.timeline({
  scrollTrigger: {
    toggleActions: 'play none none reverse',
    onEnter: () => {},
    onLeave: () => {},
    onEnterBack: () => {},
    onLeaveBack: () => {},
    onUpdate: (self) => {
      console.log(self.progress)
    }
  }
})gsap.timeline({
scrollTrigger: {
toggleActions: 'play none none reverse',
onEnter: () => {},
onLeave: () => {},
onEnterBack: () => {},
onLeaveBack: () => {},
onUpdate: (self) => {
console.log(self.progress)
}
}
})我保留了 toggleActions,因为它的值可以控制动画的播放,同时也和 onEnter onLeave onEnterBack onLeaveBack 触发时间一致,用 markers:true 多去看看,就能实现下面这种定位效果:
下面是一段伪代码做参考:
useGSAP(() => {
  let mm = gsap.matchMedia()

  const onEnter = () => {
    gsap.set('.section1', {
      position: 'fixed'
    })
  }

  const onLeave = () => {
    gsap.set('.section1', {
      position: 'relative'
    })
  }

  const onEnterBack = () => {
    gsap.set('.section1', {
      position: 'fixed'
    })
  }

  const onLeaveBack = () => {
    gsap.set('.section1', {
      position: 'relative'
    })
  }

  mm.add('(min-width: 1280px)', () => {
    gsap.timeline({
      scrollTrigger: {
        trigger: '.section1',
        start: 'top top',
        end: `+=${window.innerHeight}`,
        scrub: 1,
        toggleActions: 'play none none reverse',
        onEnter: onEnter,
        onLeave: onLeave,
        onEnterBack: onEnterBack,
        onLeaveBack: onLeaveBack,
        onUpdate: (self) => {
          gsap.to('.section1-mask', {
            opacity: self.progress
          })
          gsap.to('.section1', {
            y: -self.progress * 100
          })
        }
      }
    })
  })
})useGSAP(() => {
let mm = gsap.matchMedia()
const onEnter = () => {
gsap.set('.section1', {
position: 'fixed'
})
}
const onLeave = () => {
gsap.set('.section1', {
position: 'relative'
})
}
const onEnterBack = () => {
gsap.set('.section1', {
position: 'fixed'
})
}
const onLeaveBack = () => {
gsap.set('.section1', {
position: 'relative'
})
}
mm.add('(min-width: 1280px)', () => {
gsap.timeline({
scrollTrigger: {
trigger: '.section1',
start: 'top top',
end: `+=${window.innerHeight}`,
scrub: 1,
toggleActions: 'play none none reverse',
onEnter: onEnter,
onLeave: onLeave,
onEnterBack: onEnterBack,
onLeaveBack: onLeaveBack,
onUpdate: (self) => {
gsap.to('.section1-mask', {
opacity: self.progress
})
gsap.to('.section1', {
y: -self.progress * 100
})
}
}
})
})
})onUpdate 也很有用,这里用它拿到 progress 进度,就可以自己切换轮播图,如下面效果,只用鼠标滚轮,不用鼠标拖动:
下面是一段伪代码做参考:
useEffect(() => {
  swiperRef.current.slideToLoop(cur, 1500, false)
}, [cur])

useGSAP(() => {
  let mm = gsap.matchMedia()

  mm.add('(min-width: 1280px)', () => {
    gsap.timeline({
      scrollTrigger: {
        trigger: '.section15',
        pin: true,
        scrub: 1,
        end: '+=4000',
        toggleActions: 'play none none reverse',
        onUpdate: (self) => {
          if (self.progress <= 0.25) {
            setCur(0)
          } else if (self.progress > 0.25 && self.progress <= 0.5) {
            setCur(1)
          } else if (self.progress > 0.5 && self.progress <= 0.75) {
            setCur(2)
          } else {
            setCur(3)
          }
        }
      }
    })
  })
})useEffect(() => {
swiperRef.current.slideToLoop(cur, 1500, false)
}, [cur])
useGSAP(() => {
let mm = gsap.matchMedia()
mm.add('(min-width: 1280px)', () => {
gsap.timeline({
scrollTrigger: {
trigger: '.section15',
pin: true,
scrub: 1,
end: '+=4000',
toggleActions: 'play none none reverse',
onUpdate: (self) => {
if (self.progress <= 0.25) {
setCur(0)
} else if (self.progress > 0.25 && self.progress <= 0.5) {
setCur(1)
} else if (self.progress > 0.5 && self.progress <= 0.75) {
setCur(2)
} else {
setCur(3)
}
}
}
})
})
})想要实现这样的轮播,还需要注意元素不能太少,否则最右边会有空白,然后可以用 z-index 和过渡让轮播图更丝滑
gsap 实现数字递增动画
用 gsap 实现数字递增不要太简单,这里实现一个增强版: pin + 数字滚动动画,跟随鼠标滚动数字递增
主要依靠两个属性,一个是textContent表示文本内容,这里用来放数字,还有一个 roundProps 可以取整,就不会出现 3.1314 这种情况
鼠标下滑,数字递增,但因为数字是多个,且都从 0 开始的话会显得太快而且 1 和 10 和 100 和 1000 它们间距是不同的,考虑到这些情况,需要给数字从小于 50 的时候递增
下面是一段伪代码做参考:
const t1 = gsap.timeline({
  scrollTrigger: {
    trigger: '.item',
    end: '+=5000',
    pin: true,
    scrub: 1,
    toggleActions: 'play none none reverse'
  }
})

const section3_count = document.querySelectorAll('.count')

section3_count.forEach((item) => {
  if (!item.textContent) return
  const textContent = parseInt(item.textContent)
  t1.from(item, {
    textContent: textContent - 50,
    duration: 1,
    roundProps: 'textContent'
  })
})
const t1 = gsap.timeline({
scrollTrigger: {
trigger: '.item',
end: '+=5000',
pin: true,
scrub: 1,
toggleActions: 'play none none reverse'
}
})
const section3_count = document.querySelectorAll('.count')
section3_count.forEach((item) => {
if (!item.textContent) return
const textContent = parseInt(item.textContent)
t1.from(item, {
textContent: textContent - 50,
duration: 1,
roundProps: 'textContent'
})
})
framer motion 神器 AnimatePresence
我们常常会切换 dom,比如{cur==index?<Component1>:<Component2>},如果这样写,是很生硬的,没有过渡效果,要想有过渡效果,我们得先把元素的 opacity 慢慢变为 0 后最好给它 display:none,但这样每次自己写是挺麻烦的
framer motion 提供了 AnimatePresence 这个组件,可以解决这个问题
下面是一段伪代码做参考:
<AnimatePresence mode="wait">
  {isOpen && (
    <motion.div
      key={'menu'}
      initial={{ height: 0, opacity: 0 }}
      animate={{ height: '100vh', opacity: 1 }}
      exit={{ height: 0, opacity: 0 }}
      transition={{ duration: 0.5 }}
    >
      <div></div>
    </motion.div>
  )}
</AnimatePresence><AnimatePresence mode="wait">
{isOpen && (
<motion.div
key={'menu'}
initial={{ height: 0, opacity: 0 }}
animate={{ height: '100vh', opacity: 1 }}
exit={{ height: 0, opacity: 0 }}
transition={{ duration: 0.5 }}
>
<div></div>
</motion.div>
)}
</AnimatePresence>就可以实现比如 h5 的下拉动画: